Introduction and best tips to work on Wezen
Welcome to Wezen
How to connect
Learning Objectives
After completing this activity, you will be able to:
- Understand the "Linguistic Producer" role on Wezen.
- Log into the Wezen instance of your project.
Duration: 5 minutes
After having completed Wezen 101 course, you now know the purpose of Wezen and how it works. You know that Customers, Linguistic Producers and Production Managers work altogether on the platform in order to localize content.
As a Linguistic Producer (e.g. translator and/or reviewer), you can contribute whenever translation tasks are available in "Translation", "Review" or "Correction" step on Wezen.
You can be a translator on a specific project and a reviewer on another one, it depends on the role you have been assigned to. If you have any questions regarding your role, please contact your primary contact at Datawords.
Through this course, you will acquire the following skills to do your daily tasks smoothly:
- Access the tasks assigned to you.
- Master the translation working environment to deliver quality translations.
- Check your production statistics.
Log in
To use Wezen, each user (translator, reviewer, production manager, customer) needs an account. The credentials are provided to you upon completion of your e-Learning training by the Wezen Helpdesk. After signing into Wezen, you can find all the projects you have access to on the left-hand side Projects panel.
Moreover, it is highly recommended to use Google Chrome web browser to avoid non-compatibility issues with the platform.

Single Sign On
If you work on several Wezen instances, our Single Sign On can simplify your life. This allows you to have only one credential common to all instances.For more information on how our Single Sign On is working, please reach out to our Helpdesk.
Below are the sample emails received by the user once the account is created and added to a project in Wezen.
You will be sent a Username and Password to access the platform. (If this happens you are known as a Local user.)
For Local Users:

(LDAP users should use their Datawords credentials to access their projects)
For LDAP Users:

Start to find your work on the platform
Manage your backlog: My Tasks saved filter view
Learning Objectives
After completing this activity, you will be able to:
- Access your to-do list.
- Assign new translation tasks to yourself.
- Open a translation task.
Duration: 10 minutes
My Tasks saved filter
Accessing my to-do
All translation tasks assigned to you are accessible by selecting the My Tasks filter from the views drop down in Tasks. From this section you can start working on your tasks and manage your backlog.


In this example, as a translator/reviewer, I can see that I have 6 translation tasks assigned to me. I can see for example:
● Priority: if you see the icon  in this column, this translation task is urgent. It has an impact on the time we have for delivering this task, but remember that all your to-do is already ordered by remaining time.
Locked translation tasks
Please note that some translation tasks assigned to you may be locked and prevented from being opened until some other translation tasks are processed first. These tasks have been locked because there is another task very similar to them and once that task is translated it will automatically populate the other tasks with the same translations. This helps keep consistency throughout batches for a clear tone of voice.

Translation tasks assignation
Translation tasks can be added to your backlog in two ways. The assignation type will be decided by Production Managers at the start of the project.
1. Assignation by a Production manager
Production Managers can assign you to translation tasks. Just turn on the My Task filter view to see what has been assigned to you.
2. Auto-assignation
When auto-assignation is activated, you can assign translation tasks to yourself. To do so, just click this  symbol in the right hand menu. Then choose how many tasks you want to assign to yourself using the slider. The menu will show you how many words are in your tasks in total so you can manage your time better.
These tasks will now be available to you and can be seen in the “My Task” filter view for easy access.
 The number next to this symbol represents how many tasks you can assign to yourself, this number is predetermined in the initial set-up of the project and can be altered by your project manager.
Opening a translation task
To open a translation task already in your to-do, just double click on it and the Translation Studio will open.

Welcome in the Translation studio
Translation Studio Overview
Learning Objectives
After completing this activity, you will be able to:
- Navigate in the Translation Studio
- Understand the segments workflow
- Confirm and next to move directly to next task assigned to you
Duration: 15 minutes
My Tasks saved filter
Wezen includes a translation workbench for you to work on your translation tasks, which we call the Translation Studio. When you double click on a task assigned to you, the Translation Studio will open.
Translation Studio Overview
The Translation Studio is an environment that includes Computer Assisted Translation (CAT) tools to help you through the translation process. Its main sections are the following:

- Source segments: source content which needs to be translated. Source content is split into translation units which have a name (such as description, details, etc.) and a number of words. Source content cannot be edited.
- Target segments: this is where you will input your translations.
- Translation Memory module: it will suggest you possible translations for the selected source segment.
- Term Base module: it will suggest you possible translations for words in the selected source segment.
- Details panel: pieces of information, text or images which provide context.
- Activity panel: all the actions performed and the comments which were left on the selected target segment.
- Spelling panel: this is where the spell checker results are displayed.
- Comments: here you can leave comments on your segment if you want to say why you chose a certain word or why you changed something. (Comments will be visible to anyone viewing the task including the client).
Segment workflow in the Translation Studio
We have seen that translation tasks go through a predefined workflow. It is also the case for segments.
Below is the full list of statuses of a target segment (more detailed that the "Waiting", "In Progress", "Done" statuses, just with a slight tone difference when a segment is edited):
 : the target segment is waiting to be processed.
 : the unsaved target segment has been edited but not saved yet. Save it by clicking
  (Ctrl/Cmd + S).
 : the target segment has been saved and is waiting to be validated or further edited.
 : the previously saved target segment has been edited and it needs to be saved again or directly validated.
 : the target segment has been validated. You can still edit it.If you edit a validated segment the status will change colour to
  . You then need to either save it or validate it again.
 : the target segment is out of scope, it should not be modified except if a modification needs to be performed to preserve linguistic quality. These particular segments are already filled with validated translation. This happens when a translation task has been resubmitted by the customer or when it has been translated in another task linked to this one.
Here are the segment workflow operations:
- Save a segment: Ctrl/Cmd + S or
 . This will change the status color of the segment to
  .
. - Validate a segment: Ctrl/Cmd + Enter or
 . This will change the status color of the segment to
  .
. - If you edit a validated segment again this will change the status color of the segment to
 and must be validated again once editing is complete.
IMPORTANT
- We are dealing with a web-based platform: your content is not saved automatically, so if your page is reloaded or closed you will lose all unsaved edits. Thus the importance of always saving your work (make sure segments are saved
 or validated
  ).
).
Deliver the translation task
Once all segments are validated ( ) and you don't want to make any other modifications to the translation task, you can deliver it by clicking on the button showing the current status of the task. A drop down menu will appear with options to push to Review / Delivered status.
You will be asked to confirm you want to move the task to the next step. Once done the translation task will be delivered and moved to the next step (e.g. from "Translation" to "Review", or from "Review" to "Validation" if there is one in the workflow of the project) If you have not validated all the segments you will be asked to do this and then will have to repeat this step.
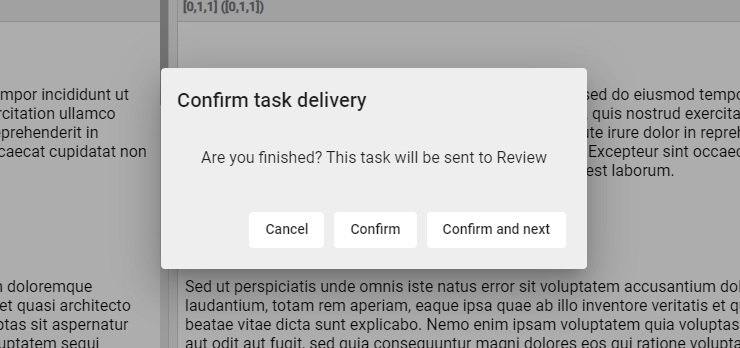
You can also click 'confirm and next' which will send the task to the next step and then automatically opens the next task assigned to you to save you going back to the Task list.
You can press cancel to return to the task.
Description of the tools
How to use the Translation Studio Tools
Learning Objectives
After completing this activity, you will be able to:
- Master translation environment.
- Understand how to check your translations using the CAT tools.
- Be ready to start working on your first translation tasks.
Duration: 35 minutes
Here we will describe all the tools and features of the Translation Studio:
- Toolbar
- Support panel (on the right)
- Translation Memory
- Term Base
- QA Check
- HTML Tag Management
Toolbar
There are lots of supporting features to help you know where you are in your task and translate efficiently and to a high quality.


Toolbar 1 - Left to right
Back Arrow - takes you back to Tasks
Task Name- This is also a drop down menu

This menu shows you task name, when it was created, the suggested delivery, the source word count.
Recently tasks - here you can navigate quickly to other tasks you have worked on recently if you want to update a translation now you have more context of that batch for example.
Discard changes and reload Task - If you ever want to start again from the beginning just click here
Back to toolbar:
Next you have your language pair Source > Target
Progress Bar - This shows you how you are getting on in the task. It will start off yellow then as you save segments it will start to become orange and when you validate segments it will become green. When you have completed your tasks and validated all your segments your progress bar will show as green.
Toolbar 2- Left to right

On this toolbar, you will find all the operations you can perform both on segments and the whole translations task. You can find a short description of each button function by hovering over it. You can also find a shortcuts guide at the end of this course.

From left to right:
- Break synchronized scrolling (if your translation becomes much longer than the target this way you can keep your text in line.)
- Zoom In
- Zoom Out
- Show HTML on task
- Toggle formatting marks
If you need to edit the HTML in a task you can reveal the HTML by clicking on <>, the HTML will show in blue. You will need to unlock it before you can edit it by holding CTRL and clicking on the HTML you want to change. Make the edits you need to and then hold CTRL and click again on the html to lock it.


From left to right:
- Merge Segment (Be extra careful when you do this as this action is irreversible)
- Copy target content of current segment to clipboard
- Undo last action
- Redo last action

From left to right:
- Erase target content for selected segment
- Copy source to target for selected segment
- Copy ALL source to target

From left to right:
- Bold
- Italic
- Underline
- Strikethrough

From left to right:
- Undo indent
- Indent

- Insert link to text - This works just like Word. Highlight the word or URL or click you would like to add a link to and press the button. Insert the link URL and click OK. The link, word or URL will now appear blue.


- Insert Special Characters

- Insert Left to Right Marker
- Insert Right to Left Marker

- Insert List
- Insert Bullet points

- Justify
- Left align
- Center align
- Right align

- Find and replace - Replace 1 result or all results
Right Hand Support Panel
 Details widget: Provides pieces of information, text or images which provide context for the translation.
 Warnings Widget: This widget contains all the QA warnings and errors that might be occurring in the translation segment like missing HTML tags or missing numbers.
 Spell Checker: This is where the spell checker results are displayed. You can also search the spell checker
 Translation Memory module: It will suggest you possible translations for the selected source segment.
 Term Base module: It will suggest you possible translations for words in the selected source segment.
 Comments: This is where you can find the remarks in each line.
 History: All the actions performed and the comments which were left on the selected target segment.
 Machine Translation: It will automatically translate the translation batch using the configured MT provider via API.
Spellchecker
Lastly, the "Spellchecker" tab acts as a dictionary for selected words in target segments. Misspelled words will still underline as normal and you can right click to access your normal desktop spell checker. You can also type a word into the Wezen spelling panel to search for the spelling. You can also search for words in the dictionary directly from there, by typing a word in the text bar at the top of the panel. Copy and paste the suggestion you want back into the target.

Highlight TB - HTML Output
- Highlight all the term present in the TB when activated (see the Term Base paragraph below)
- Show an output of the HTML.

Translation Memory
The Translation Memory widget can be accessed on the right, among other icons in the side-bar. Its purpose is to display translations for which the detected source content matches its own source content at a certain percentage. Information about these translations such as comments or status are displayed.
Wezen will fetch previous records of translated segments that fully or partially match the source segment currently being processed. Target segments will be automatically filled if these matches are 70% matches or above, to avoid you having to translate from scratch.
A source segment can have several possible translations, therefore for one source segment, there can be several 100% match target segments. You can pick another entry in the list by clicking the  at the right of the entry.
You can also look for entries in the Translation Studio by typing words in the Translation Memory search bar to search in source language, or in the target language by clicking on this button 
As soon as a target segment is validated, it is added to the Translation Memory.

Translation Memory statuses
There are 3 different statuses for TM suggestions:

- Translated: Translation has not been reviewed (i.e translation was only proposed during "Translation" step). These suggestions should be used with caution
- ApprovedTranslation: Translation has been reviewed (i.e. translation has been proposed during "Review" step or has been edited by a reviewer). These suggestions can be used with a good level of confidence.
- ApprovedSignedOff: Translation has been validated (i.e. translation has been proposed during "Validation" step or has been edited by a customer). These suggestions should be preferred over other suggestions with the same or lower match percentage.
Context matches
The Translation Memory suggestions are displayed with context icons showing whether these suggestions have already been used with the same previous/following source segments. Hovering over them will show between which source segments the selected segment appeared in previous translation tasks.
a. This suggestion has not been used in another translation task with the same previous and following source segments

b. This suggestion has already been used in another translation task with the same previous and following source segments.

c. This suggestion has already been used in another translation task with the same following source segment

Term Base
The Term Base is a glossary containing different terms in a given language and one or several translations. When selecting a segment, Wezen will analyze the source content and display the term base suggestions on the bottom-right corner of the Translation Studio.

In the source segment, recognized terms are highlighted in yellow: You can pick an entry in the list and add it to the target segment by clicking on the  to the right of the entry. Suggestions are ordered by relevance.
Terms can have 3 different statuses: preferred, approved or rejected by the client. Note that rejected terms are displayed in red in the Term Base tab.

By clicking on the three dot menu you can add extra information you might want to see like the date of the last usage for example:

NB: you can also look for entries in the Term Base by typing words in the Term Base search bar
If you use a term rejected in the Target Segment, it will be highlighted in red. Preferred and approved are highlighted in yellow:
QA Check
The Translation Studio also includes a QA check (Quality Assurance checker) to notify you that some linguistic conditions about target segments are not met (such as empty segments, punctuation, etc.). For each target segment, you can find the number of errors (in red) and warnings (in orange).
- Error: no error should be left when you deliver your translation task, except when you think they are not relevant.
- Warning: warnings should be corrected but they are to be considered more like a guideline (e.g. when a term from the term base is not used).
Hovering over QA check badges will display the number of errors and warnings on that segment. you can see what they are by clicking n the segment and . This will open the QA widget and show you the warnings and errors for the selected segment as seen for section 2 below.

HTML tags and entities management
Sometimes, there will be source segments containing HTML tags, you can see the HTML in your source by clicking on <> ( you can tell it's HTML because they usually start and end with brackets “<“, “>”, or "&" and are in blue font).
You must always make sure that if HTML tags are present in the source segment, they must also be present in the target segments.
If you need to add/modify/delete them, you first have to convert them into text. Once edits are finished, make sure to convert them back into HTML. By default, HTML tags are locked so that you cannot edit them. To unlock them:
- Make sure the segment is open for edition (not in validated state), either by directly editing the segment or clicking on it. (Ctrl/Cmd + O).
- Click on the HTML button <> to reveal the HTML.
- Click on the Unlock icon
 then click on the HTML you want to unlock
 - Make your required edits
- Then Highlight the HTML and click on the Lock icon

It is important to remember to re-lock your edited HTML otherwise it would work.

Quick tip: Resizing panels
You can resize the Translation Memory/Term Base panels by clicking and dragging the top edge of the panel.
You can also hide/expand the Details/Activity/Spelling panel by clicking on the arrow on the left edge of the panel.

Track your data
Check your personal statistics: My Stats
Learning Objectives
After completing this activity, you will be able to:
Check and follow your statistics.
Duration: 5 minutes
My Stats
The MyStats can be found in your profile in which you will find some personal information as well as your workload over the previous 7 days.

Profile Summary: all your personal information

Workload: the volume of content you have validated over the last 7 days
You can select the time interval and choose between "Word Count" or "Task Count" display options.
External resources
Quickstart Guide & Shortcuts Guide
Please find below two documents which summarize all the skills you've learned today.
Download our Quickstart Guide!

