Affected users
- To complete this action, to create, edit and manage a local configuration, you must be a Manager. Only this role on the platform can access to this "Settings" page.
Access to the "Settings" page and to the "Local configurations" interface
Step 1: Access to the "Settings" page
As Manager, you can see on the left side of your screen, the "Settings" page
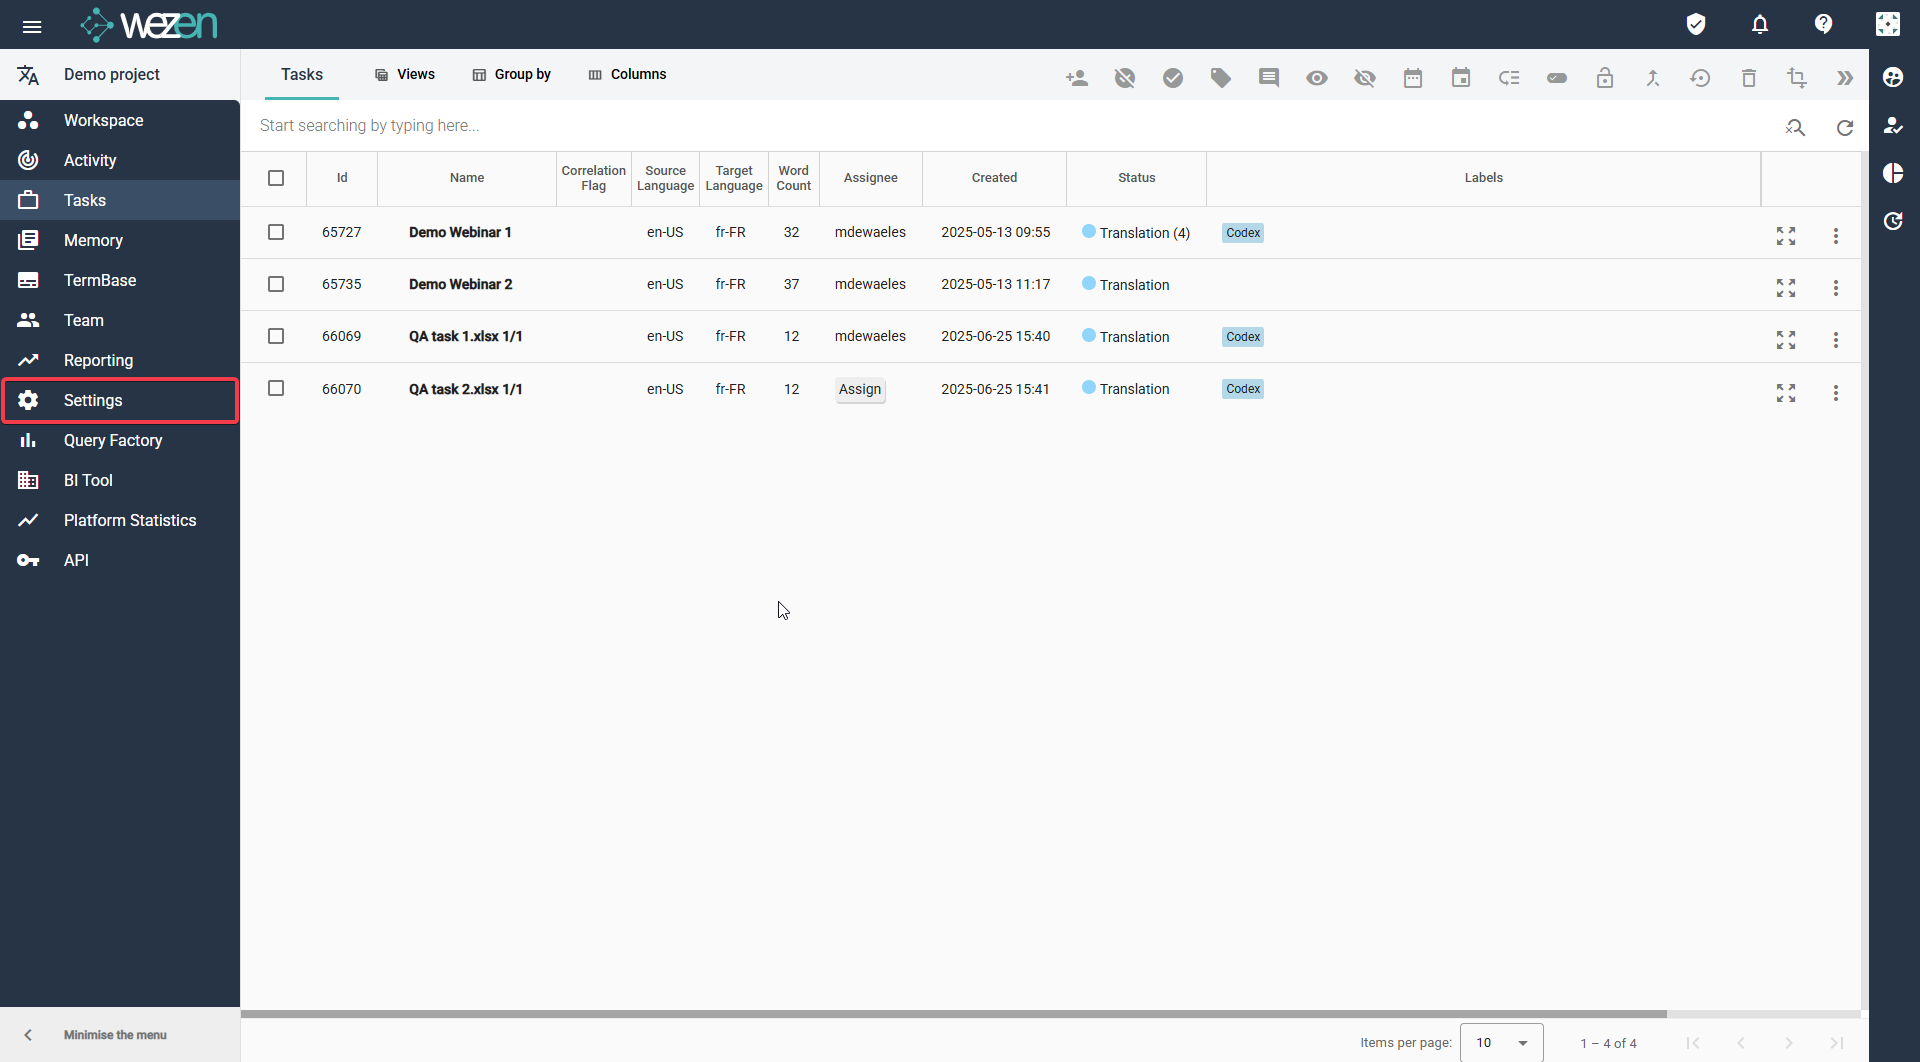
Step 2: Access to the "Local Configurations" interface
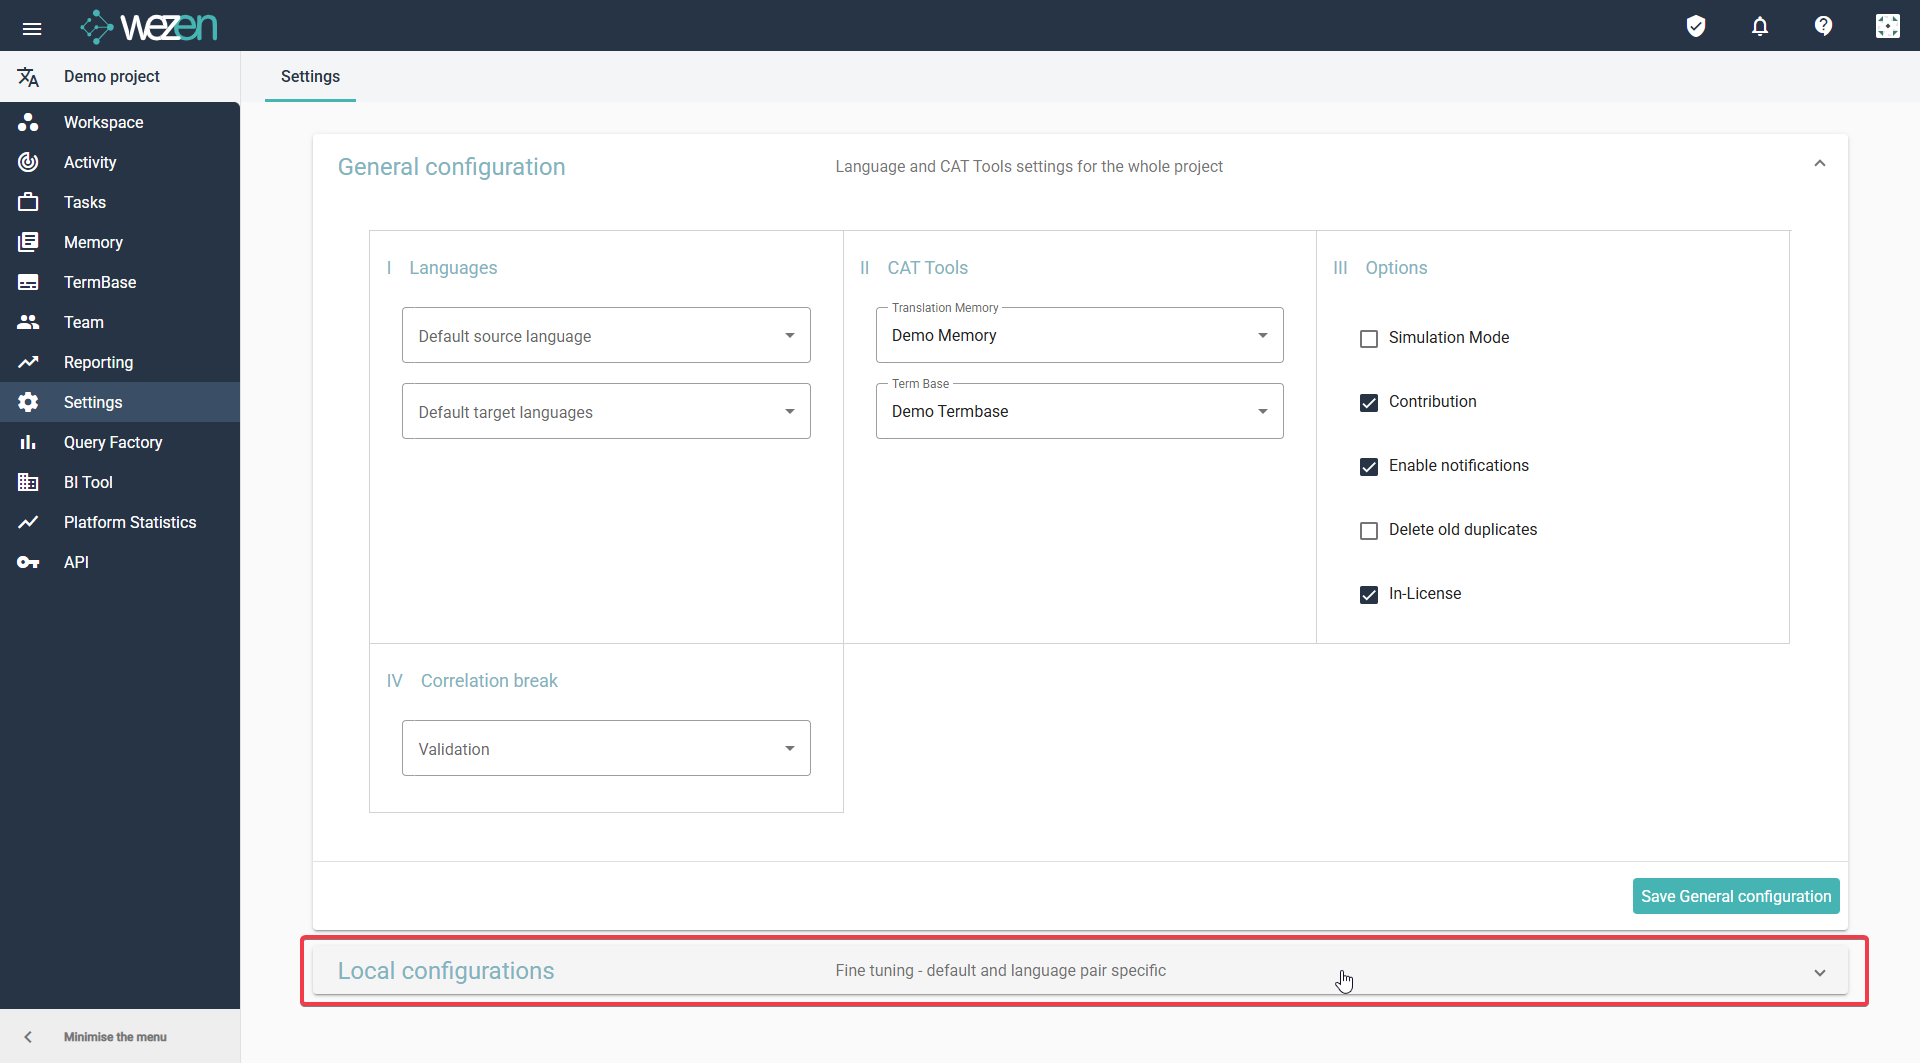
Inside this page, you can access to the General configuration of your project (TM, TB, options, etc.)
At the bottom of your screen, you can see the local configurations, click on it to extend the interface.
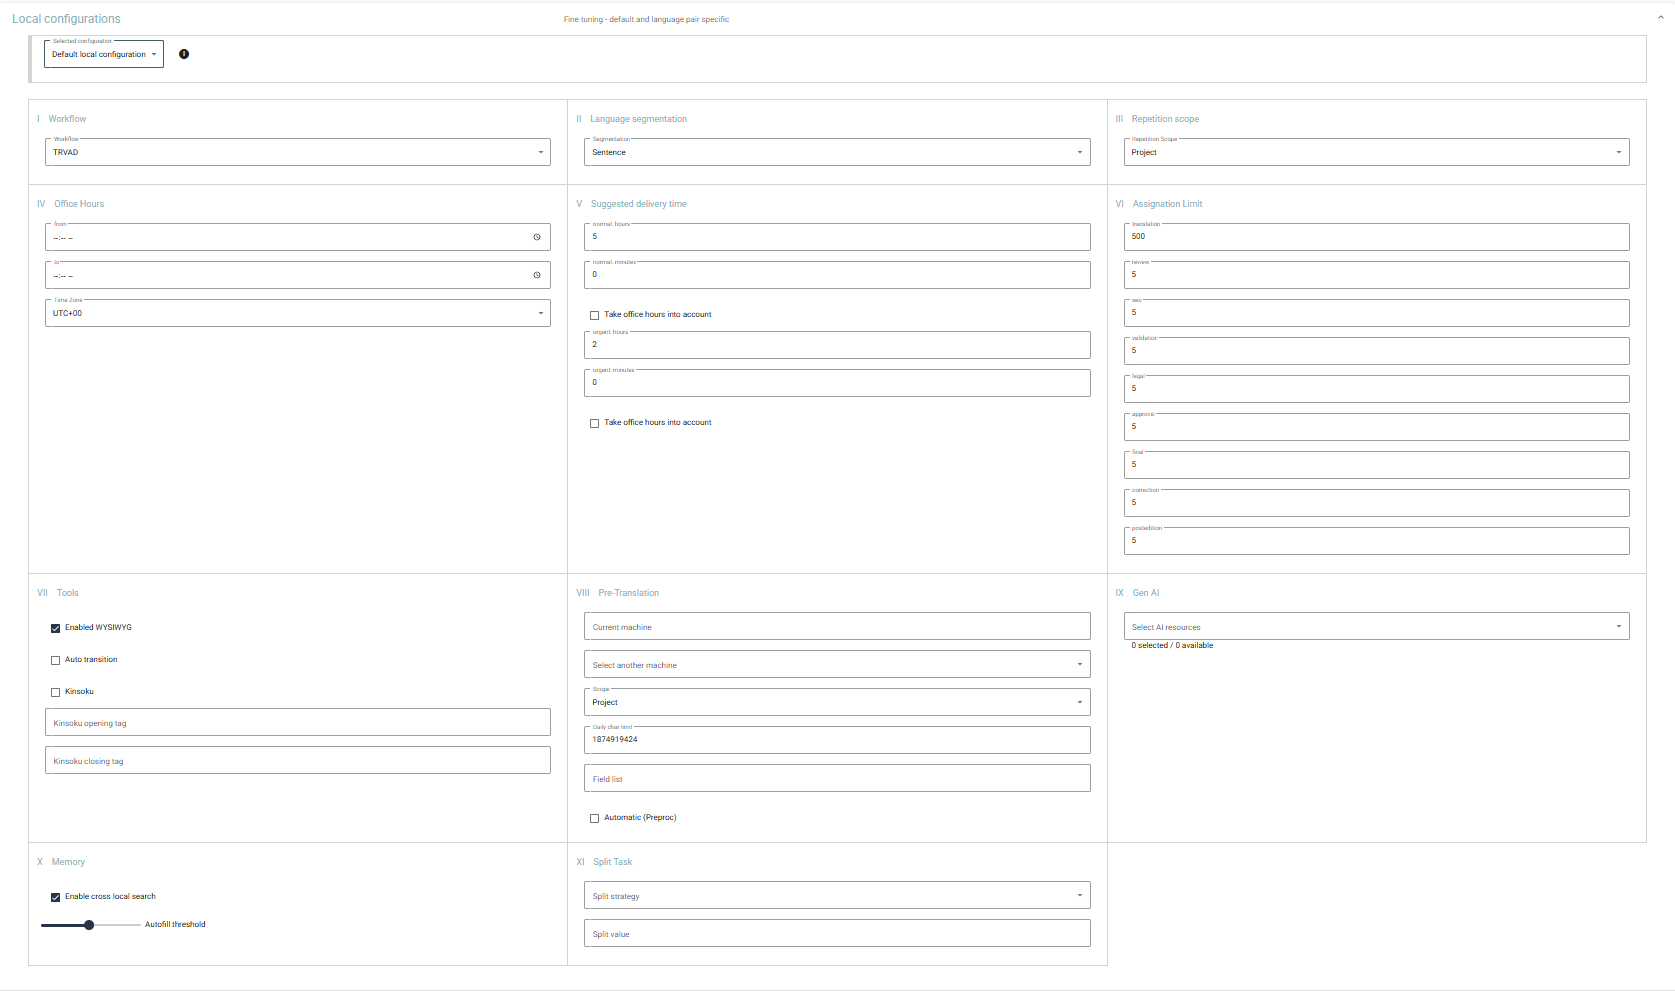
What you can set up as local configuration
Inside this interface the Manager can customize the project according to the needs for all users
At the creation of the project, there is only one Default local configuration for all languages.
You can personalize per section:
- The Workflow (to define how many steps of translation and validation you need)
- The Language segmentation (to create a segment per sentence or paragraph for example)
- The repetition scope (the correlation mechanism needed)
- The office hours (to set up the deadline per time zone)
- The Suggested Delivery time (to define an automatic delivery deadline on your tasks)
- The Assignation limit (to define how many task a type of user can auto-assign per day)
- the Tools (to access to some additional linguistic tools like the HTML view in the Translation Studio)
- The Pre-Translation (to configure an engine to perform the pre-fill of the segment)
- Then GenAI (to configure an engine for the to use at anytime inside the translation studio)
- The Memory options (to define the % of completion by the TM and the cross local completion)
- The Split Task (to customize the size of a translation task)
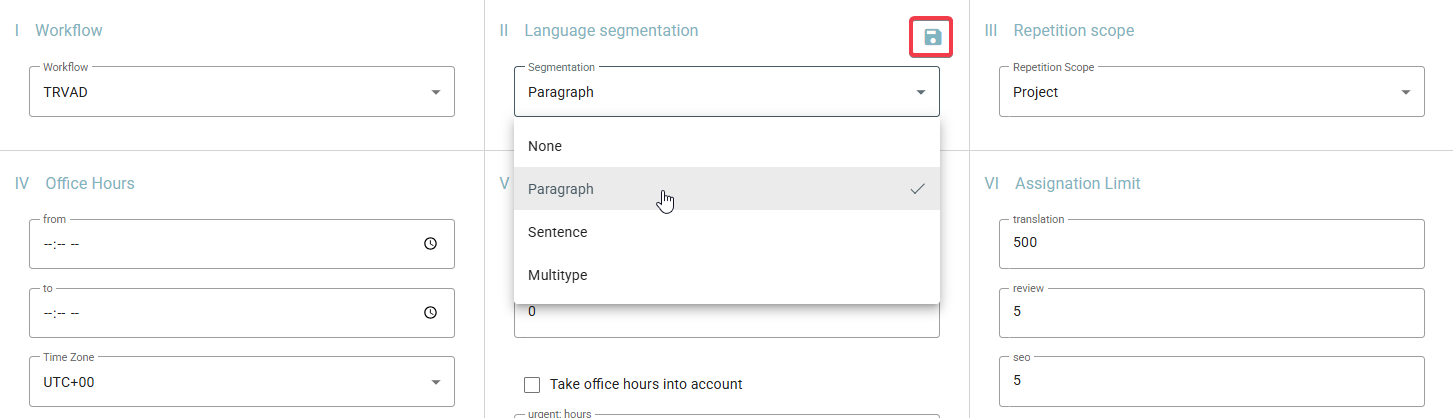
Each time you update a section, make sure you save the modification like the example below, the logo appears to ask you to save and validate the update.
Warning: If you update the "Default local configuration" the settings are applied for all languages of your project. If you need to create other local configurations, the new local configurations you create will have specifics settings that you will configure as explain below.
Create and edit a new "Local configuration"
Step 1: Create a new Pair language as new local configuration
When you need to create a new local configuration, it means that for a specific pair of languages, you need to apply a specific set up for one or several of the sections describe above
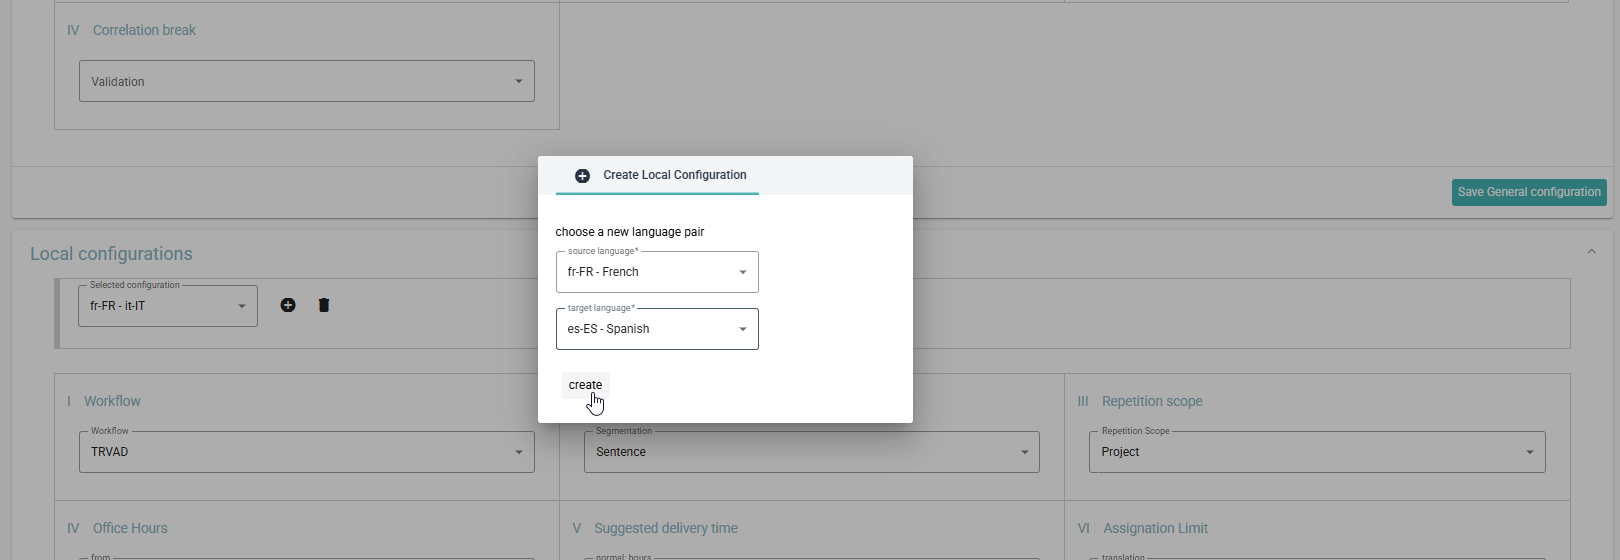
To create a new one, click on the "+" button
A window appears to select the source and target language you need to configure, then click on create.
Step 2: Update the settings your need for your new local configurations
When the local configuration is create, it always comes empty of configuration as you can see in the screenshot below. You must set up from scratch all the sections depending your needs like the workflow, the repetition scope, MT engines, etc.

Each time you edit a new section don't forget to save all your modifications as described above.
You must save it each time with the logo

Warning: If you create a new local configuration without copy pasting the settings from the default local configuration or edit it as you need. For this specific code languages, the content that will arrive on Wezen won't be well configured and this can have an impact on your project, your translation, your teams.
If inside the default local configuration there is a specific set up, you must at least copy paste them in your new local configuration or edit them as you need.
Demo:
- I show the Default local configuration and the settings.
- I create a new local configuration.
- I duplicate the settings from the Default local configuration to my new local configuration. Each time I save the settings. You can also personalize the settings for this new local configuration as you need, for example if the the workflow is different or if an engine must be plugged.